Thai Peanut Quinoa and Chickpea Salad


Whenever I have leftover quinoa in the fridge, I get excited at the thought of making this recipe!  The recipe is super quick and easy, and the dressing is sooo good! I love the combination of salty and sweet!  The original recipe is from Cookie and Kate and I’ve tweaked the ingredients slightly.  The beans make it a bit heartier, and I love the fact that it is a 1 bowl recipe.

3/4 cup cooked quinoa (I usually use whatever I have leftover)
1 cup shredded cabbage (I buy pre-shredded)
1 cup grated carrot
13 oz chickpeas
1/4 cup chopped scallions
1/4 cup peanuts or cashews

Dressing
1/4 creamy peanut butter
4 tbsp coconut aminos (you can use soy sauce but coconut aminos are a tad sweeter depending on the brand)
1.5 tbsp maple syrup
1.5 tbsp rice wine vinegar
1 tsp avocado oil
1 tsp freshly grated ginger
1 tbsp lime juice

1. In a large (I use 4qt) bowl, make the dressing by combining all dressing ingredients.
2. Once dressing is made, add all other ingredients to bowl and toss.
3. Enjoy!

Bridal Shower Advent (Countdown) Wedding Calendar


Last fall, I was the matron of honor in my best friend’s wedding.  I absolutely loved helping plan her shower!  When it came time to put together a gift from the bridesmaids, I wanted to be extra creative. I decided to create a bridal countdown, or “advent” calendar, to help countdown the days until her wedding!

Since her wedding was on the 6th of the month and we wanted to give her more than 6 gifts, we decided to give her a gift a day for 30 days before the wedding.  The gifts we chose were for pampering, to use on the wedding day, or to take on the honeymoon.

Here’s how I made it:

List of Supplies
Cork board (mine was 23″x35″ which fit 30 small gifts.  You can. use Rub ‘n Buff to change the color of the frame!)
Hot glue gun and glue sticks
Gift wrap
Mini gift bags
Tulle
Organza bags (comes in a variety of sizes)
Small Chinese food container gift boxes
Curling ribbon
Fabric ribbon or twine (to tie the tulle together)
Embellishments such as faux flowers
Tissue paper
Shredded paper (for inside the gift bags for a pop of color)
Iron on trim tape (for border)
Pin back hooks (for the extra heavy items)
Decorative Push Pins 1, 2, 3
Gifts (listed below)


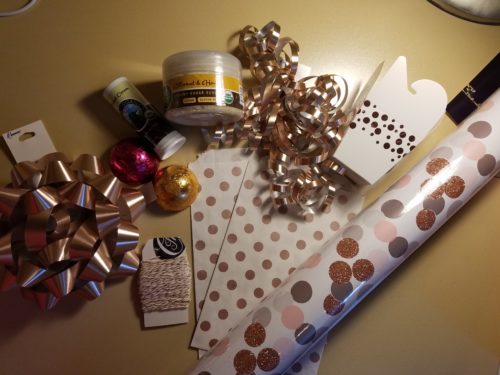
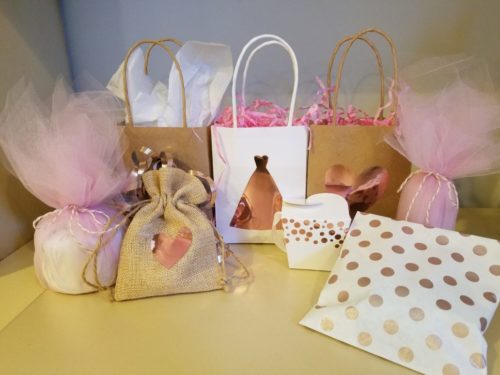
1. Gather all of your supplies and wrap the gifts accordingly.  Some items I wrapped in wrapping paper, while others I wrapped in tissue and put inside a small organza bag or tulle.


2. If you are going to paint, Rub ‘n Buff or embellish the border of the board, do that first before glueing the items.


3. As you purchase the gifts, lay all of them out on the cork board to see where (if) they all fit.

4. Once you have placed all of the gifts onto the cork board, start to pin and glue the gifts.  The wrapped gifts were hot glued. The gifts inside the tulle and organza bags were then pinned or tied to a hook pin, onto the board.  I used corsage pins (pearl top) so the pins looked pretty. 🙂  Note: If I pinned items to the board, I also glued the item.

5. I used my Cricut machine to cut numbers, hearts and bridal silhouettes out of Metallic Vinyl and glued them onto the gifts. If you do not have a cutting machine, you can purchase sticker numbers from your local craft store to place on the gifts.  You may have to purchase more than 1 pack to make sure you will have all of the numbers you need.  My bridesmaids and I double and triple counted the numbers to make sure we weren’t missing any!

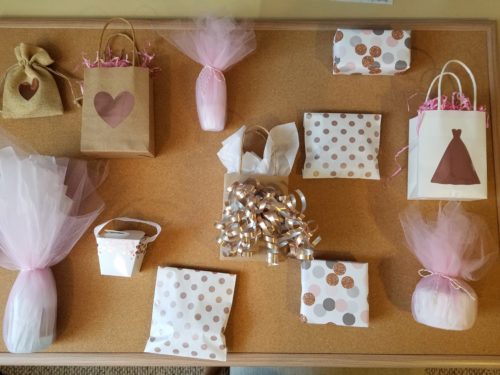
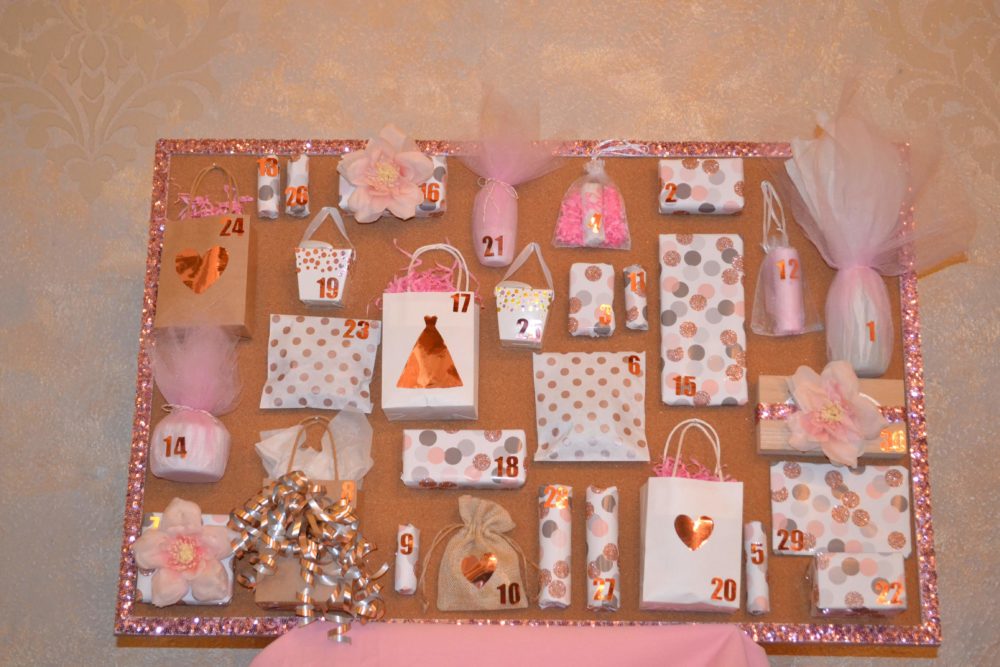
Here it is the board completed!:

Below I linked the majority of the items I wrapped for the calendar.  Remember to keep them small!  Many of the items below come in sets and can be broken apart to use on different days. Other gift ideas not included below are: votive candles, bath bombs, gift certificates to a nail salon, spa, dinner, etc., wine bottle topper, slipper socks, brides favorite perfume, makeup, etc., ring holder, jewelry

What’s in the Calendar
1 Wifey Sleep Mask 2 Lotion Sticks 3 Lip Scrub 4 Plant Therapy Essential Oils (Break apart to use for various days) 5 Bridal Emergency Kit 6 Hanky Panky “I Do” Thong 7 Verdi Spumante 187ml Mini Bottle 8 “Bride to Be” Karma Organic Nail Polish 9 Honey Moonin’ Tank 10 Badger Stress Soother 11 Zoya Nail Polish 12 Body Scrub 13 Wifey Tank Top 14 Waterproof Cellphone Pouch 15 After Sun Balm 16 Dead Sea Face Mask 17 Lip Balm (Break apart to use for various days) 18 Tweezerman Nail Kit 19 Organic Stress Ease Tea 20 Organic Hand Sanitizer 21 Natural Deodorant 22 Innersense Hair Trio (Break apart to use for various days) 23 Hair Salt Spray 24 Rose Water Facial Spray 25 Mini Face Oils (Break apart to use for various days) 26 Carry On Cocktail Kit 27 Foldable Beach Hat 28 On the go Jewelry Cleaner 29 Kate Spade Mrs. Necklace 30 Kate Spade Ring Dish 31 Mr. and Mrs. Pillowcases 32 Foldable Wet Brush 33 Travel Leave in Conditioner  34 Vow Books

Things to Consider
-The amount of gifts you purchase is up to you.  My friend got married on the 6th of the month, however I wanted to purchase more than 6 gifts for her so I decided to do 30 days.
-The largest items I wrapped were a tank top and a bottle of prosecco.  The tank top was tightly rolled and tied with a ribbon and placed in a gift bag (get creative!).  The prosecco (in a glass bottle) was wrapped it in tissue, tulle, tied around the neck with a long ribbon, and then secured it to the BACK of the cork board with the ribbon and a thumb tack.  I also glued the bottle to the board so it didn’t move. (Number 1 on the board exhibits this.)
-In my opinion, it is easier for 1 or 2 people to coordinate and buy all of the gifts versus many people purchasing the gifts.
-This post contains affiliate links which help offset the cost of maintaining this blog.

Before and After Butterfly Wall Decor


When we purchased our current home, I decided I was going to tone it down on the gold decor.  In our previous house, our colors were warm (think BM Wilmington Tan, Georgian Green), and I used gold picture frames and accessories to  keep the warm feel.

Since purchasing our new home, I have become obsessed with mercury glass and lighter, cooler hues!  I fell in love with the above wall decor from Pier 1, but debated on purchasing it for awhile since it wouldn’t match my current decor and I wouldn’t know where to hang it!

And then I had an idea…why not spray paint the piece the color I want?  Any silver pieces I have in my house have antiquing on them, so I also decided to put a glaze on top.

I used this Krylon Metallic silvery spray paint and sprayed 2 coats on it.

Once dry, I used Valspar antiquing glaze.  Instead of using a rag per the instructions, to apply the paint, I used a dry paint brush and lightly brushed the glaze on.  If the antiquing looked too heavy, I would wipe off excess with a rag.  I love antiquing because it does not need to look perfect.  It also gives the piece a lot of dimension!  What do you think?  Do you like it before or after?


*Post contains affiliate links*

Gluten Free, Dairy Free, Refined Sugar Free, Fruit Baked Oatmeal

One of my family’s favorites!  You can’t go wrong with any combination of fruit in this
warm oatmeal bake.

Ingredients
2 cups old-fashioned oats ( love One Degree since they are organic and sprouted)
2 teaspoons cinnamon
1 teaspoon baking powder
3/4 teaspoon fine sea salt
1/4 teaspoon ground nutmeg
1 3/4 cups coconut milk
1/3 cup maple syrup (if vegan) or honey
2 eggs or flax eggs if vegan
3 tablespoons melted coconut oil
2 teaspoons vanilla extract
1 mashed banana (sweetens, since there is no added refined sugar)
1 cup of berries or any chopped fruit you desire (can also be frozen pieces of fruit!)

Combos I have tried:
Banana + Strawberries, blueberries and blackberries
Banana + Mango, peach, apples
Banana + Apples


Directions
1. Preheat oven to 375 and coat your baking dish with coconut oil.
2. Mix all of the dry ingredients (oats, cinnamon, baking powder, sea salt, nutmeg) in 1 bowl, set aside.
3. Mix all of the wet ingredients (mashed banana, coconut milk, syrup or honey, eggs, melted coconut oil, vanilla extract).
4. Combine all ingredients in a large bowl and gently mix in fruit.
5. Once gently mixed, carefully pour into baking dish and place in center of oven.
6. Bake for 40-50 minutes or until cooked all the way through.

Adapted from Cookie and Kate.
Post may contain affiliate links.

Soy Free Vegan Ricotta

Being Italian and lactose intolerant really sucks sometimes.  I was thrilled to find Kite Hill almond ricotta in my local whole foods, but $9 for a tiny amount can be crazy if you need more than 1 tub.

I was on a search for an authentic almond based ricotta, soy free, and I came across this one from Minimalist Baker.  It came out SO GOOD, that when I told my dairy-ricotta-loving husband I made too much and was going to give some to my mom, he told me “no!” and that he planned on spreading it on some toast with honey for breakfast.

I unfortunately was unable to find organic almond slivers in my local store, so I used non organic ones from Trader Joe’s.  I am on the lookout for organic slivered almonds, if anyone knows where to find some, please let me know! 🙂

2 cups slivered almonds
3 tsp Sari Foods Nutritional Yeast (non fortified, organic and no synthetics!)
2 Tbsp lemon juice
1/2 – 3/4 tsp sea salt
1 generous dash garlic powder
1-2 cups of water
2-3 Tbsp fresh basil, oregano, or parsley (optional)

Add all ingredients (start with 1 cup of water and 1/2 tsp salt) to a high powdered blender such as a Vitamix and blend until smooth.  You will need to stop the blender multiple times to scrap down the sides and add some water.  I ended up using approximately 2 cups of water to get the texture I was looking for and added a bit more salt for taste.

This post contains affiliate links.